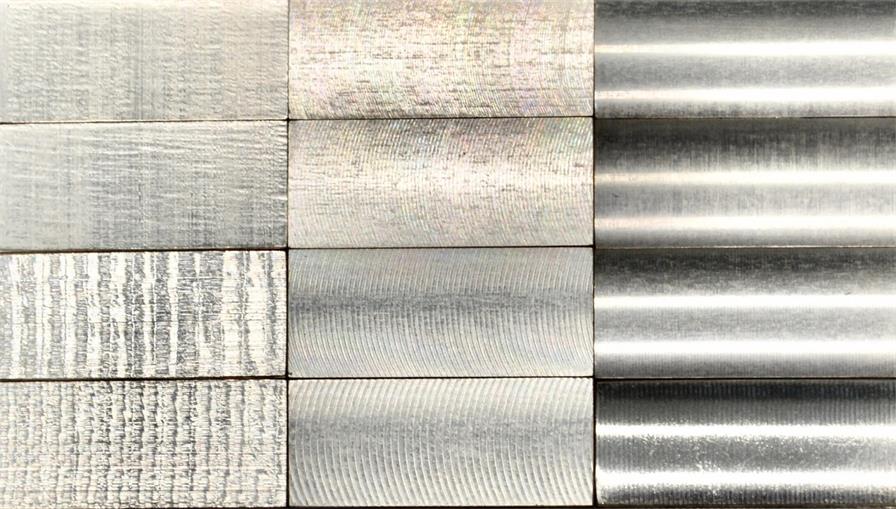
In modern manufacturing, CNC Machining technology is widely used across various industrial sectors due to its high precision and efficiency. Surface roughness is one of the key indicators for assessing the quality of CNC Machining, directly affecting the appearance, functionality, and lifespan of the workpiece. JIESHENG will explore the definition of surface roughness in CNC Machining, measurement methods, influencing factors, and optimization strategies.

Definition and measurement of surface roughness

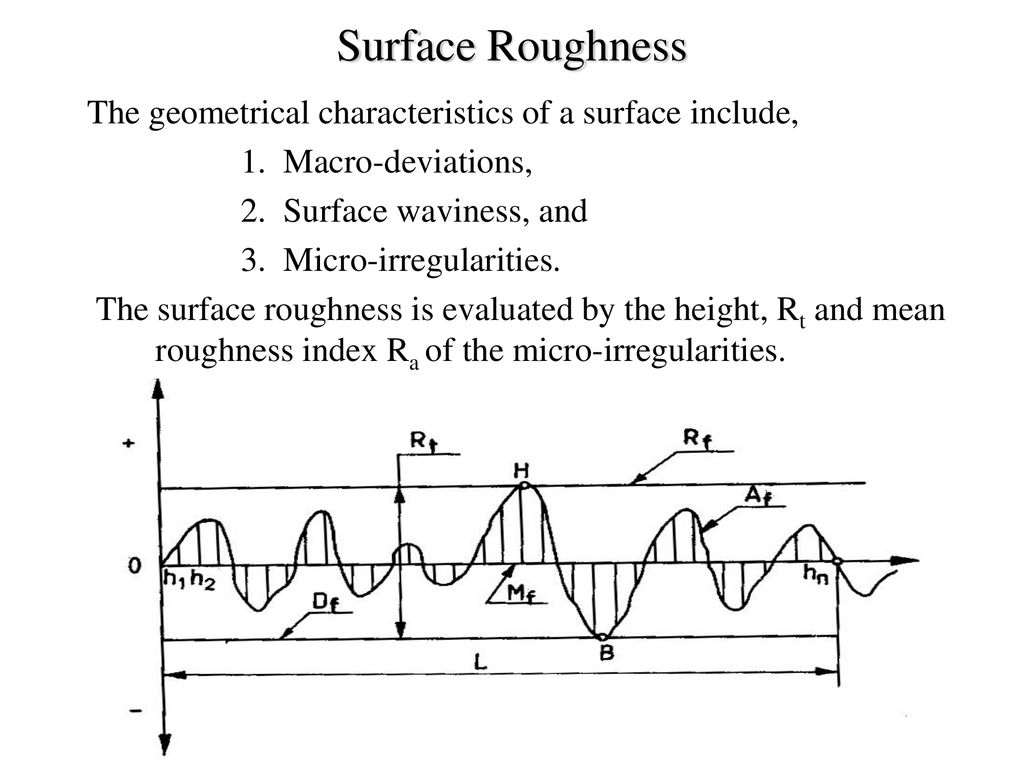
Surface roughness refers to the degree of microscopic unevenness on the surface of a workpiece. These tiny unevennesses include pits, protrusions and scratches, which are usually described by different roughness parameters. The most common roughness parameters include:
Ra (arithmetic mean roughness): Ra is the most commonly used surface roughness parameter, which represents the average value of the absolute value of the height deviation of the workpiece surface. It can intuitively reflect the overall level of surface roughness.
Rz (ten-point height): Rz represents the ten-point height of the surface height deviation, that is, the vertical distance between the highest and lowest points of the surface. This parameter is particularly suitable for describing situations where the surface height varies greatly.
Rq (root mean square roughness): Rq is the root mean square value of the surface height deviation, which takes into account all surface fluctuations and provides more comprehensive roughness information than Ra.
Surface roughness can be measured using a roughness meter or optical measuring equipment. The roughness meter scans along the surface of the workpiece with a probe to record the tiny surface fluctuations, while optical measurement uses lasers or other optical technologies to detect surface features. These measurement methods can help manufacturers accurately evaluate the surface quality of the workpiece and provide data support for further processing.
Factors affecting surface roughness in CNC machining
Surface roughness in CNC machining is affected by many factors, including cutting parameters, tool status, Material properties, machining methods, and post-processing processes.
Cutting parameters: Cutting speed, feed rate, and tool depth are the main cutting parameters that affect surface roughness. Higher cutting speeds generally produce smoother surfaces because it reduces friction between the tool and the workpiece. Relatively low feed rates and smaller cutting depths also help reduce surface roughness. However, the adjustment of cutting parameters requires finding a balance between machining efficiency and surface quality to avoid excessive tool wear or affecting production efficiency.
Tool type and condition: The type, wear and geometry of the tool directly affect the surface quality after processing. Sharp and well-designed tools can reduce vibration and friction generated during processing, thereby obtaining a smoother surface. Regular replacement and maintenance of tools are important measures to ensure processing quality.
Material properties: Different materials behave differently in CNC processing. For example, materials with higher hardness are usually more difficult to process and may result in greater surface roughness. The elasticity, cutting force and thermal conductivity of the material will affect the processing effect. Therefore, when selecting a material, it is necessary to consider its matching degree with the processing technology.
Processing method: Different CNC processing methods, such as turning, milling and drilling, have different surface roughness characteristics. Turning usually produces a smoother surface, while milling may produce more surface texture. Choosing the right processing method and optimizing the processing parameters can effectively control the surface roughness.
Post-processing process: The surface after CNC processing can be further improved by post-processing processes such as grinding and polishing. Post-processing processes can remove minor defects generated during processing and improve the smoothness and glossiness of the surface. Choosing the right post-processing method can significantly improve the overall quality of the workpiece.
Strategies for Optimizing Surface Roughness in CNC Machining
In order to achieve ideal surface roughness in CNC machining, manufacturers can adopt the following strategies:
Optimize cutting parameters: According to the workpiece material and machining requirements, select appropriate cutting speed, feed speed and tool depth. Conduct cutting parameter optimization experiments to find the best machining conditions to obtain satisfactory surface quality.
Select suitable tools: Use high-quality tools and check and replace them regularly. Select tool types that match the machining materials, such as carbide tools or coated tools, to improve machining results.
Control the machining environment: Keep the machining environment stable, such as temperature, humidity and vibration. These factors will affect the cutting performance of the tool and the surface quality of the workpiece.
Perform post-processing: After CNC machining, perform appropriate post-processing processes such as grinding and polishing to remove tiny surface defects and improve the surface smoothness and glossiness of the final workpiece.
Continuous monitoring and adjustment: Real-time monitoring is carried out during the production process, and adjustments are made according to the actual machining situation. Use quality inspection tools to regularly check the surface roughness of the workpiece to ensure that the machining quality meets the requirements.
Surface roughness in CNC machining is one of the important indicators for evaluating machining quality. By understanding its definition, measurement methods, influencing factors and optimization strategies, manufacturers can effectively control and improve machining quality to meet the needs of different application scenarios. Continuously optimizing cutting parameters, selecting appropriate tools, controlling the machining environment, post-processing and real-time monitoring can all help improve the surface roughness of CNC machining and ensure the accuracy and reliability of the workpiece.


 English

